TigerVNC VNC Viewer

With the TigerVNC VNC Viewer app, you can access the graphical user interface of a remote computer. In this article you can find how to create and configure the TigerVNC session.
How to Create a Session
In the profile configurator, go to Apps > TigerVNC VNC Viewer > Sessions.
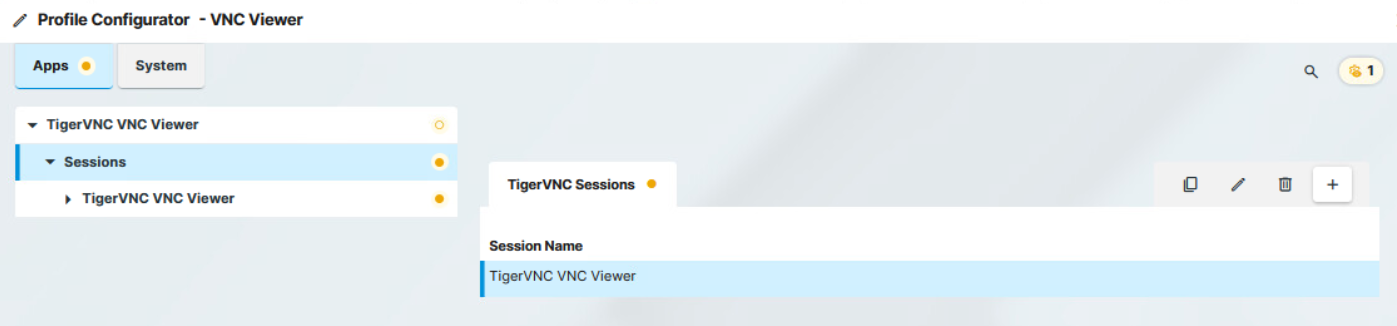
To manage the list of TigerVNC sessions:
Cick
 to remove the selected entry.
Click
 to edit the selected entry.
Click
 to copy the selected entry.
Click
 to create a new session.
The new session is created. The starting methods for the session are described under Starting Methods for Apps .

Configuring the TigerVNC session
Configuring the Connection

You have the following options to configure the VNC connection under Apps > TigerVNC VNC Viewer > Sessions > Session name > Connection:
Name or IP address of VNC server
Host name or IP address of the VNC server
Password
User password for logging on to the VNC server, if necessary
Session passwords are stored with reversible encryption. Therefore, we strongly recommend not to store the session password on the endpoint device.
Security types
Comma separated list of VNC security types to use. Leave empty for default. (Default: TLSVnc, VncAuth)
Possible values:
X509Plain
TLSPlain
TLSVnc
X509None
TLSNone
RA2
RA2_256
RA2ne_256
VncAuth
None
Pathname for CA certificates file
Used for X509* security types. File can contain one or more concatenated CA certificates in PEM format.
Pathname for certificate revocation list file
Used for X509* security types. File containing CRLs in PEM format.
Setting Compression

You have the following options to configure the compression for the TigerVNC session under Apps > TigerVNC VNC Viewer > Sessions > Session name > Compression:
Compression level (default=2)
Allows you to select the compression level; 0 ist the lowest, 9 is the highest compression. (Default: 2)
JPEG quality level
Allows you to select the image quality. 1 means the highest compression and the lowest image quality, 9 means the lowest compression and the highest image quality. (Default: 8)
Configuring Input

You have the following options to configure the input for the TigerVNC session under Apps > TigerVNC VNC Viewer > Sessions > Session name > Input:
View only
- Mouse and keyboard inputs are not forwarded to the remote computer. You can only observe the remote computer.
- Mouse and keyboard inputs are forwarded to the remote computer. You can remote control the remote computer. (Default)
Pass system keys directly to the server (full-screen)
- You can use system key combinations in the TigerVNC session, e.g. [Alt] + [Tab]. (Default)
- System key combinations cannot be used in the TigerVNC session.
Menu key
Key which brings up the menu
Possible options:
F8 (Default)
F2 ... F12
Pause
Print
Scroll_lock
Escape
Insert
Delete
Home
Page_up
Page_down
Misc Settings
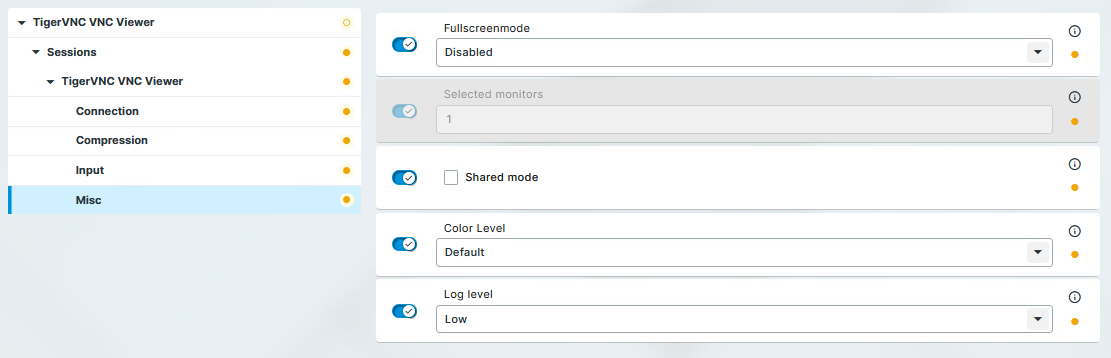
You have the following options to configure further settings for the TigerVNC session under Apps > TigerVNC VNC Viewer > Sessions > Session name > Misc:
Fullscreenmode
Which monitor to use when in full-screen mode.
Possible options:
Disabled: The session is not shown in full-screen mode, the taskbar is visible. (Default)
Current: The session will be shown in full-screen mode on the currently used monitor. The taskbar is not visible.
All monitors: The session will be shown in full-screen mode on all monitors. The taskbar is not visible.
Selected: The session will be shown in full-screen mode on selected monitors defined under Selected monitors. The taskbar is not visible.
Selected monitors
Enter the number of the monitor(s) you wish to use in full-screen mode. You can enter multiple numbers separated by comma, for example, if you would like to use monitor 1 and 3, enter: 1,3
Shared mode
- When starting a session, other users’ sessions with the same server are not terminated. The sessions run alongside each other with equal status.
- If another user has a TigerVNC session with the same server, the other user’s session will be terminated when the session is started. (Default)
Color Level
The color level used in TigerVNC VNC viewer sessions. If the session is running over a small bandwidth connection, the value can be configured to reduce the needed bandwidth.
Possible options:
Default: The highest available color level is used. The TigerVNC VNC viewer automatically selects the level based on the speed of the connection. (Default)
Very Low (8 colors): The TigerVNC VNC viewer is forced to use the color level regardless of the speed of the connection.
Low (64 colors): The TigerVNC VNC viewer is forced to use the color level regardless of the speed of the connection.
Medium (256 colors): The TigerVNC VNC viewer is forced to use the color level regardless of the speed of the connection.
Log level
TigerVNC defines the log level between 0 and 100, with gradually increasing level of detail in the logs. You can configure the level of debug logging using the following options:
Quiet: 0 level logging, without error logs
Low: includes error logs
Middle: includes detailed logs on top of error logs
High: 100 level logging, including all details for debugging